

Drawing is a wonderful way to express creativity, and with the right approach, anyone can learn to draw! If you're looking to get started or just want to improve your skills, easy drawing step by step tutorials are a great way to break down the process into simple, manageable steps. Whether you're interested in Santa Claus drawing, superheroes, or even car drawing step by step, we've got plenty of fun and easy drawing ideas to help you on your artistic journey. Let’s dive in and learn how to draw with these simple instructions!
1. Santa Claus Drawing
Santa Claus is one of the most beloved characters, and he’s perfect for a drawing project, especially around the holidays. A Santa Claus drawing can be easy and fun if you break it down step by step.

Santa Drawing Step by Step:
- Draw the Face: Start with a big circle for Santa's face. Add a smaller circle inside for the nose, and don’t forget his big, round cheeks.
- Draw the Hat: Add a fluffy, rounded Santa hat on top of the circle. Make sure it has a pom-pom at the end!
- Facial Features: Draw two small eyes, a large round nose, and a thick, curly mustache and beard. Santa’s beard should be wavy and cover most of his face.
- Add the Body: Draw a simple rectangular shape for his body and add details like buttons on his coat and a belt.
- Finishing Touches: Don’t forget to add his boots, gloves, and a little sack of gifts if you want to complete the look!
This cartoon Santa drawing is playful, easy to follow, and can be personalized with fun accessories or details like a reindeer or a sleigh.
2. Cartoon Santa Drawing
If you're looking for a simpler, more cartoonish version of Santa, follow these steps to create a friendly and cute cartoon Santa drawing:

- Draw a Big Circle: Start by drawing a large circle for Santa's head.
- Add His Hat: Draw a small triangle shape for the Santa hat, with a rounded edge at the bottom. Add a pom-pom at the tip.
- Facial Features: Draw large, friendly eyes, a small nose, and a big smile. His cheeks can be round and rosy.
- Draw the Beard: Draw a simple, fluffy beard by adding a couple of curved lines along the bottom of the face.
- Finish with the Body: Draw a simple rectangle for his body, and add a belt and boots for a cute finishing touch.
This style is easy, fun, and perfect for kids or anyone who enjoys cartoon-style drawings.
3. Kids Car Drawing
Drawing cars can be a fun challenge for kids, especially when broken down into easy-to-follow steps. Whether it’s a race car or a simple vehicle, kid's car drawing can be a rewarding project.
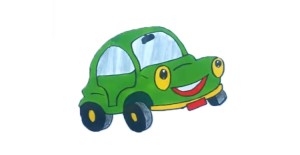
Car Drawing Step by Step:
- Draw the Car’s Body: Start by drawing a long, horizontal rectangle for the car’s main body.
- Add the Wheels: Draw two circles beneath the rectangle, making sure they are evenly spaced.
- Shape the Roof: Draw a smaller rectangle on top of the body for the roof and windshield. You can make it slanted or flat, depending on the type of car you’re drawing.
- Details: Add details like windows, a bumper, headlights, and doors. Don’t forget to add a grill and some lines for added texture.
- Color It In: Finally, color your car in bright, bold colors like red, blue, or yellow.
This kids car drawing step by step is simple enough for young artists but also allows for some creativity with the car’s design and color!
4. Superheroes Drawing
Every kid (and many adults) loves superheroes! Whether it’s Superman, Spider-Man, or a unique character, learning how to draw superheroes can be exciting. A superheroes drawing is a great way to practice drawing both dynamic poses and distinctive costumes.
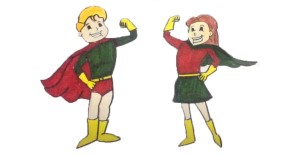
Superhero Drawing Step by Step:
- Draw the Basic Body: Start with a basic stick figure or oval shapes for the head, torso, and limbs. This helps outline the character's pose.
- Add the Outline: Draw the superhero’s body around the stick figure, adding muscles and curves for a more defined form.
- Costume Details: Draw the superhero’s costume, including the emblem, cape, boots, and gloves. Superheroes often have bold shapes and accessories, so get creative!
- Face and Expression: Draw their facial features, such as the eyes, mask, and mouth. Many superheroes have determined or heroic expressions.
- Add Action Lines: For extra drama, add lines to show the motion—like a flying superhero or one mid-punch!
Creating a superhero can be simple or detailed depending on the character’s complexity, but this superhero drawing step-by-step makes it easy to get started!
5. House Drawing Step by Step
Drawing a house is a perfect beginner project and can be as detailed as you like. Follow this house drawing step-by-step guide for a simple and cute home illustration.

- Draw the Foundation: Start with a square or rectangle for the base of the house.
- Add the Roof: Draw a triangle or a slanted roof on top of the base.
- Draw the Door and Windows: Add a rectangle for the door and square or rectangular shapes for the windows.
- Add Details: You can add a chimney, a pathway, and a few trees to decorate the scene.
- Finish with Shading and Texture: Use light shading to give the house depth and texture to the roof or walls.
This simple house drawing step by step can be a fun way to introduce kids to architecture and creativity, and they can make the house their own by adding extra details like flowers, a garden, or a mailbox.
6. Car Drawing Step by Step (More Detail)
If you're looking to take your car drawing to the next level, try a more detailed version with the following steps:
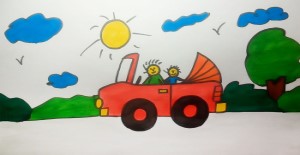
- Draw the Base: Start by sketching the shape of the car’s body—a long oval or rectangle works best.
- Add the Wheels: Draw two circles underneath the body, and make sure they are aligned properly.
- Outline the Car’s Shape: Use curved lines to add the top of the car and the windshield.
- Draw the Details: Add headlights, windows, a grill, and door lines. Cars have lots of small details that can really bring the drawing to life!
- Color and Shading: Finish the drawing with colors and shading to make the car look realistic.
This car drawing step by step method works for all kinds of cars—whether you want to draw a classic car, a futuristic vehicle, or a sports car!
Conclusion
Learning to draw is a fun and rewarding process, especially when you have clear, step-by-step instructions to guide you. Whether you're drawing Santa Claus, a superhero, or a car, breaking down the drawing into simple steps makes it easier to create a fantastic piece of art. These easy drawing step by step guides are designed for beginners and can be enjoyed by kids and adults alike. So grab your pencils, pick a drawing idea, and start sketching today—you’ll be amazed at what you can create!
Visit The Soft Roots
