

Spiderman Drawing Step by Step
Creating a Spiderman drawing may seem challenging, but anyone can sketch the iconic superhero with a structured step-by-step process. Here’s a detailed guide to help you draw Spiderman, focusing on basic shapes and gradually building up details. Grab your pencil and paper, and let’s get started!
Materials Needed:
- Pencil
- Eraser
- Black marker or ink pen (for outlining)
- Coloring materials (optional)
- Drawing paper
Step 1: Start with the Head
Begin by drawing a simple oval shape for Spiderman's head. The oval should be slightly longer vertically to represent his characteristic face shape.
- Tip: Don't worry about making it perfect. Just ensure it’s proportionate for the rest of the body.
Step 2: Sketch the Torso
Below the head, draw a large, somewhat rectangular shape to represent Spiderman's torso. It should taper slightly toward the waist to give him that athletic, superhero build.
- Tip: Consider it an elongated box with softer edges for more natural curves.
Step 3: Add Guidelines for Limbs
Now, lightly sketch in the guidelines for his arms and legs. These will act as a framework for the final drawing. Use long lines for the arms and legs, bending them at the joints to show action poses.
- Tip: Spiderman is often drawn in dynamic poses, so bends his limbs slightly to give the appearance of movement.
Step 4: Draw the Arms and Legs
Using the guidelines, flesh out the arms and legs by drawing cylinders around them. Keep the forearms and lower legs slightly thicker as you move toward the body and narrow as you reach the hands and feet.
- Tip: Make sure to add muscular detail but keep it sleek, as Spiderman is not as bulky as some superheroes.
Step 5: Sketch the Hands and Feet
At the ends of the arms, draw Spiderman's hands in a classic web-shooting position. His fingers should be extended in a web-slinging gesture, with the index and pinky fingers pointing outwards. For the feet, draw simple shapes for now, which we’ll add more detail to later.
- Tip: Hands and feet are often tricky. Keep it simple at first and add details gradually.
Step 6: Define the Face
Now, move back to the head and start detailing the face. Draw two large almond-shaped eyes. These should cover most of the face, giving him that signature Spiderman look. You can also add a light grid to mark where the web pattern will go later.
- Tip: The eyes are crucial in giving Spiderman his iconic look, so take your time to make them expressive.
Step 7: Add Webbing to the Suit
Next, it's time to work on the web pattern of Spiderman's suit. Start by drawing curved lines around his head in a circular pattern, moving outward from the eyes. Extend this pattern to the torso, arms, and legs. The webbing should wrap around his body, following its curves.
- Tip: Be patient with this step, as the webbing detail can be time-consuming but is essential for authenticity.
Step 8: Refine the Costume
Once the webbing is complete, begin to add more details to Spiderman's suit. Focus on his spider emblem in the center of his chest. Draw a small spider shape, keeping the legs thin and pointed. You can also add the muscular definition, especially around his shoulders and chest, to give him a heroic appearance.
- Tip: Use reference images of Spiderman's suit to ensure accuracy.
Step 9: Outline the Drawing
After you’ve finished with the sketch, take a black marker or ink pen and carefully outline the entire drawing. Go over the main lines, erasing any unnecessary guidelines as you go. This will make your drawing stand out and give it a polished, professional look.
- Tip: Work slowly and steadily when inking, as it's harder to correct mistakes once the ink is down.
Step 10: Add Color (Optional)
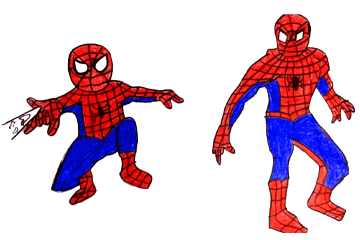
Now comes the fun part—adding color! If you want to color in your drawing, use red for most of the suit, blue for the sides of the torso and legs, and black for the webbing and spider emblem. Add highlights and shadows to give the drawing depth and make it pop.
- Tip: You can use colored pencils, markers, or digital coloring tools to add the finishing touches.
Conclusion
Drawing Spiderman step by step allows you to build the superhero's iconic form from basic shapes to a detailed, dynamic figure. With practice and patience, you’ll be able to capture the essence of Spiderman in your own style. Keep practicing, and soon you’ll be drawing Spiderman in various action poses and scenes!
Always Visit our blog Easy Kids Learning Corner
