

Birds Drawing
Drawing birds in flight can be a beautiful and rewarding experience. Capturing the grace and motion of a bird soaring through the air requires attention to form, perspective, and movement. Follow this step-by-step guide to create dynamic flying bird illustrations, whether you’re drawing realistic birds or stylized versions.
Materials Needed:
- Pencil
- Eraser
- Black marker or pen (for outlining)
- Coloring materials (optional)
- Drawing paper
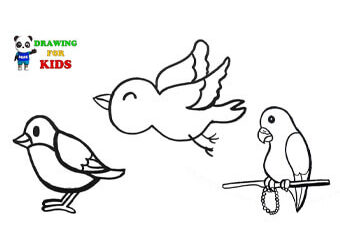
Step 1: Draw the Basic Body Shape
Start by sketching the bird’s body. Most birds in flight have an elongated, oval-shaped body, with the tail feathers slightly pointed at the end. This shape represents the bird's torso and will serve as the foundation for the rest of the drawing.
- Tip: Keep the shape simple and light at this stage, as you’ll refine it later.
Step 2: Add the Head and Beak
Next, draw a small circle for the bird's head at one end of the oval, slightly tilted to convey movement. Extend a small, triangular shape from the head to form the beak.
- Tip: Depending on the bird species you are drawing, the beak may vary in size and shape, but it’s usually small compared to the body.
Step 3: Sketch the Wings
The wings are the most critical part of a flying bird drawing. Start by sketching two long, curved lines extending from each side of the body. These will act as the "spine" of the wings. The wings should be wide, and the curve should point upward to show that the bird is soaring.
For each wing, draw a second line beneath the first to represent the width of the wing, making them more substantial.
- Tip: Birds’ wings in flight are often curved upward when they are flapping up or stretched out when gliding. For a gliding bird, keep the wings extended without too much curve.
Step 4: Outline the Tail Feathers
At the bottom of the body, draw the bird’s tail feathers. They should fan out slightly, with multiple elongated shapes representing the individual feathers. Tail feathers help balance the bird in flight, so they should be large enough to look proportionate to the wings and body.
- Tip: Depending on the bird species, the tail can be short and broad or long and narrow.
Step 5: Define the Wing Feathers
Now that you have the basic wing structure, it's time to add feathers. Birds have different sets of feathers, but the primary ones to focus on are the long-flight feathers at the tips of the wings. Draw long, slightly curved lines extending from the edge of the wing down to the base. The feathers should fan out naturally and follow the curve of the wing.
- Tip: Make the feathers longer at the outer edges of the wings and shorter as you move inward.
Step 6: Refine the Body and Add Details
Go back to the bird’s body and head and refine the shape. You can add details like eyes (a small circle on the head), texture on the beak, and the lines of the bird’s feathers on its body. You can also smooth out the shape of the torso and give the bird more defined muscles, especially around the chest and wings.
- Tip: If you’re drawing a specific bird species, look at reference images to accurately depict its features.
Step 7: Position the Legs
Birds tuck their legs while flying, so if you want to show them, sketch them lightly beneath the body. They should be small and bent toward the back of the bird’s body, with claws slightly curled.
- Tip: You can skip this step if you prefer to focus on the wings and overall flying motion.
Step 8: Add Movement and Flow
To give your bird drawing a sense of motion, add flow lines around the bird. These can be simple, curved lines trailing from the wings or body to indicate the direction of flight. You can also slightly blur or exaggerate certain wing feathers to convey motion.
- Tip: Adding dynamic lines or gentle shading behind the wings can enhance the feeling of movement.
Step 9: Outline the Drawing
Once you’re happy with your sketch, use a black marker or ink pen to outline the entire drawing. Carefully trace over the major lines—wings, body, tail feathers, and head—erasing any leftover pencil guidelines afterward. This will help define the bird and give the drawing a clean, finished look.
- Tip: Be sure to take your time when outlining the feathers, especially along the wings and tail.
Step 10: Add Color
If you wish to add color to your flying bird, this is the time to do so. Use coloring pencils, markers, or digital tools to shade the bird. Most birds have colorful plumage, so experiment with different tones for the wings, tail, and body. For a more realistic look, add shading to areas that would naturally be in shadow, such as the underside of the bird’s wings.
- Tip: If you’re drawing a specific species, research its color patterns for accuracy.
Conclusion
Drawing flying birds can be an enjoyable and rewarding artistic challenge. By breaking down the process into simple steps—starting with basic shapes and then adding detail—you can capture the beauty and grace of birds in flight. With practice, you can master the proportions and motion to create dynamic and lifelike bird drawings.
Always Visit our blog Easy Kids Learning Corner
