

Bubble letters are a fun and creative way to add style to your writing. Whether you're making signs, and posters, or just doodling for fun, mastering bubble letter drawing can elevate your artwork. In this guide, we'll show you how to draw bubble letters for each letter of the alphabet, from "A" to "Z". Follow along, and soon you'll be able to create your own bubble-letter masterpieces!
What Are Bubble Letters?
Bubble letters are a type of stylized lettering where each character is drawn with a rounded, soft appearance, similar to a bubble or balloon. These letters often have thick, rounded edges that make them look "puffy" or inflated. They are playful and eye-catching, making them perfect for creating posters, logos, or any project that needs bold, fun text.
Materials You'll Need
Before you start, gather a few supplies:
- A pencil (for sketching)
- An eraser (to clean up mistakes)
- Colored markers, pens, or crayons (for adding color)
- Paper
Basic Steps for Drawing Bubble Letters
While each letter has its unique form, the basic steps for drawing bubble letters are similar. Here's how to do it:
Start with Basic Letter Shapes
First, write out the letter normally in a simple, clear font. This will act as the skeleton of your bubble letter.Outline the Bubble Shape
Using the basic letter as a guide, draw an outline around it with curved, rounded edges. The key here is to make the lines thick and bubbly. Avoid sharp corners and aim for smooth, soft curves.Add Final Details
Once the outline is done, you can add final details like shading or highlights to give the bubble letter a 3D effect. You can also color in the letters to make them pop!
Now let’s dive into how to draw each letter of the alphabet with the bubble letter style.
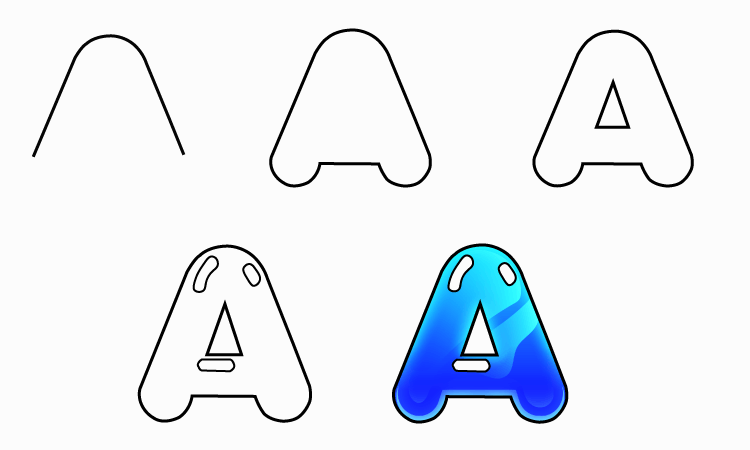
Bubble Letter A Drawing
Start with a simple triangular "A". For the bubble version, round the top and bottom edges. Make the legs of the A curvy and puffy. Keep the middle line of the "A" rounded as well. This gives the letter a smooth, balloon-like appearance.
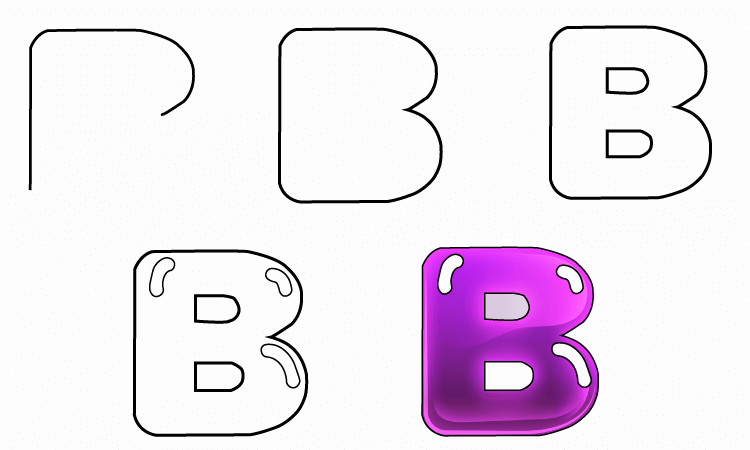
Bubble Letter B Drawing
For the letter B, begin with two stacked circles to form the loops. Round out the vertical line of the letter to give it a puffy look. Ensure the circles are symmetrical and balanced, with a smooth, continuous curve all around.
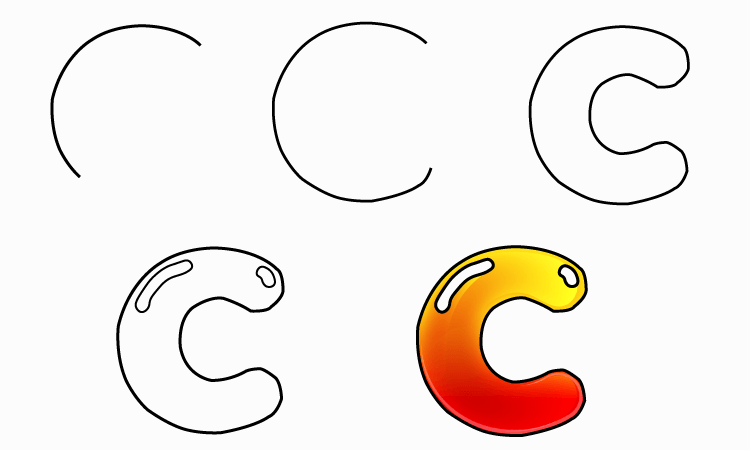
Bubble Letter C Drawing
The letter "C" is relatively simple to bubble. Start with a normal "C" shape, but round the edges and thicken the curves. Ensure the open side of the "C" remains smooth and consistent.
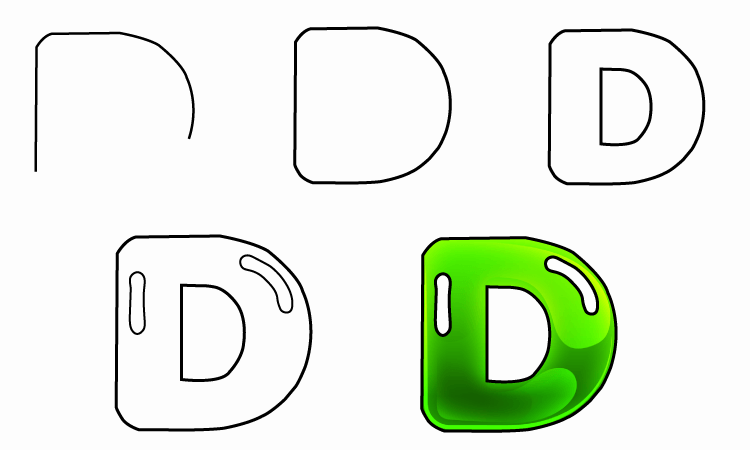
Bubble Letter D Drawing
Draw a simple "D", then add rounded edges to the vertical line and the curve. Make the top and bottom parts of the "D" bulge out a bit to make it look more inflated.
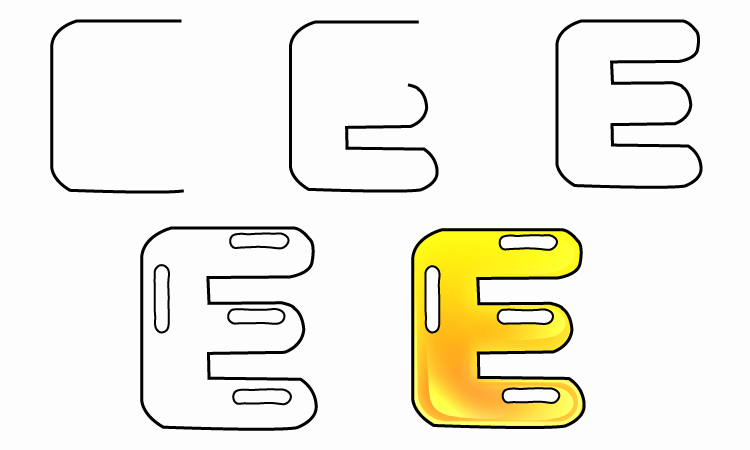
Bubble Letter E Drawing
For the "E", start by drawing a standard "E". Round the corners and edges, and puff up the horizontal lines. The vertical line should have a soft, rounded edge as well, keeping the overall form balanced and bubbly.
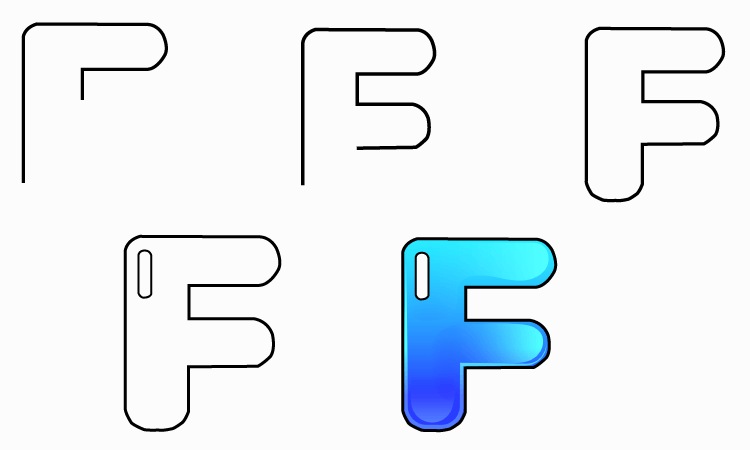
Bubble Letter F Drawing
The "F" starts as a simple "F", but round the vertical line and the horizontal arms. The arms should look puffy and thick, with smooth curves. The whole letter should have a soft, rounded feel.
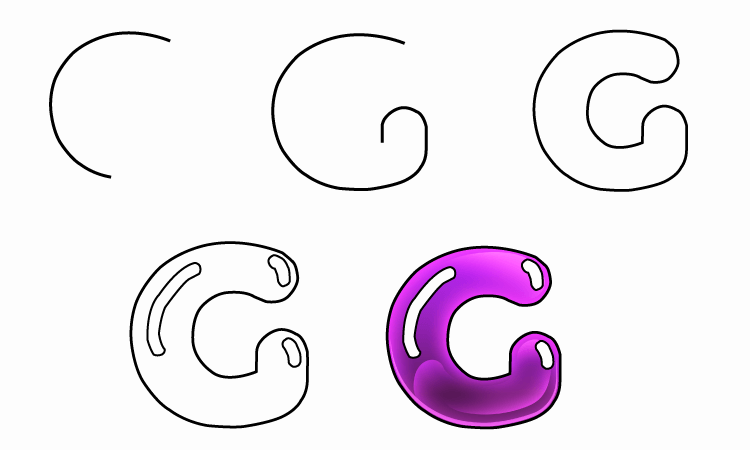
Bubble Letter G Drawing
The "G" is similar to a regular "C" with an extra tail at the bottom. Start with a circular "G" shape, and round off the edges. Add a curvy tail that follows the rounded style of the letter.
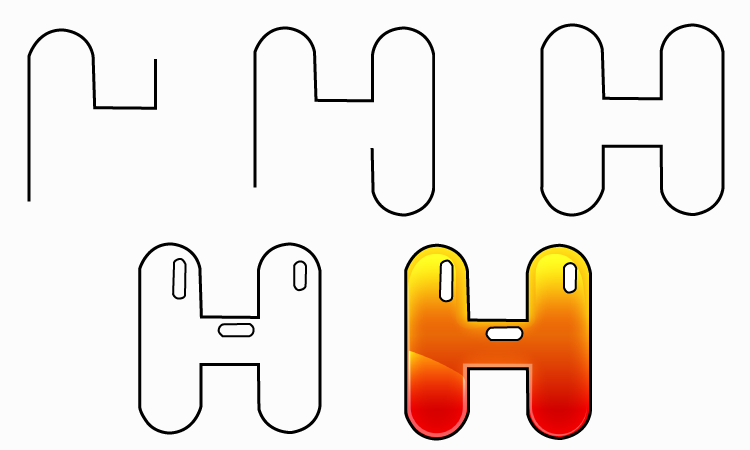
Bubble Letter H Drawing
For the "H", make the vertical lines puffy by rounding them out. Add rounded edges to the horizontal bar connecting the two lines. The overall shape should have a full, rounded appearance.
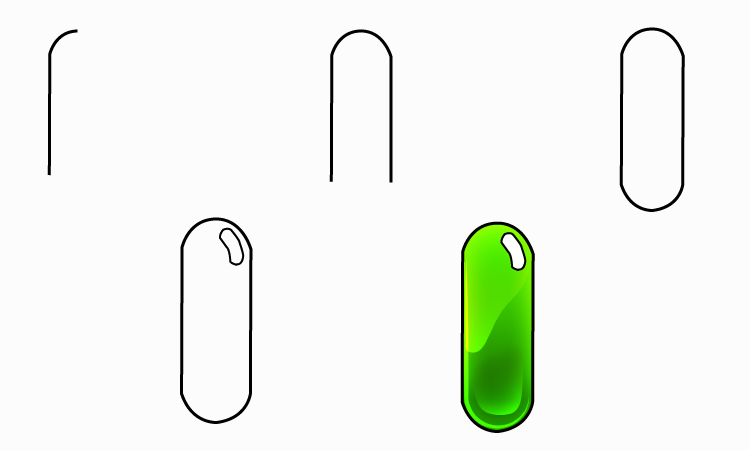
Bubble Letter I Drawing
For "I", start by drawing a straight line. Then, round the top and bottom to make it more bubble-like. You can also add a little curve in the middle to make the letter appear more playful.
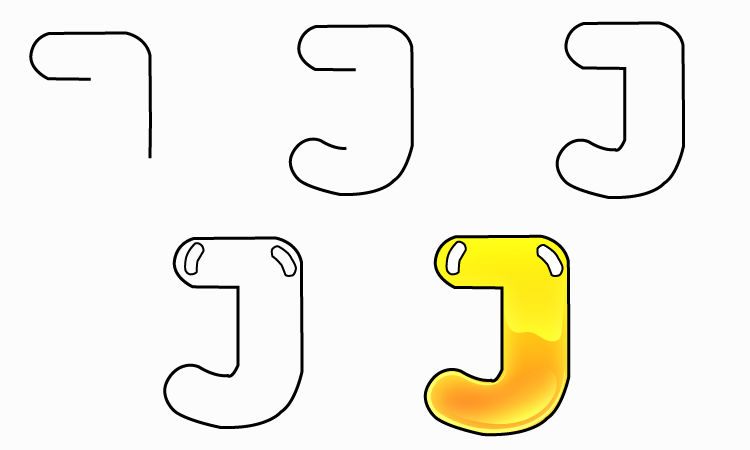
Bubble Letter J Drawing
The "J" starts with a hook-like shape. Round off the top, and thicken the curve at the bottom to make it look puffed up. The overall look should resemble a soft, inflated "J".
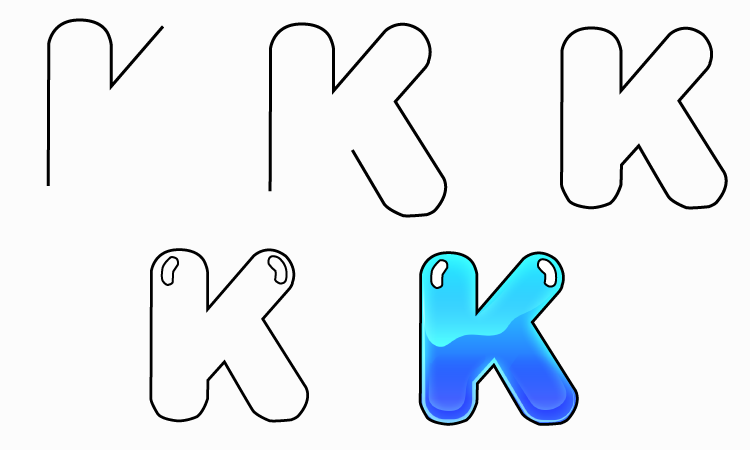
Bubble Letter K Drawing
Begin with a standard "K", but round the vertical line and the diagonal arms. Make the arms of the "K" curve smoothly, creating a soft, balloon-like appearance.
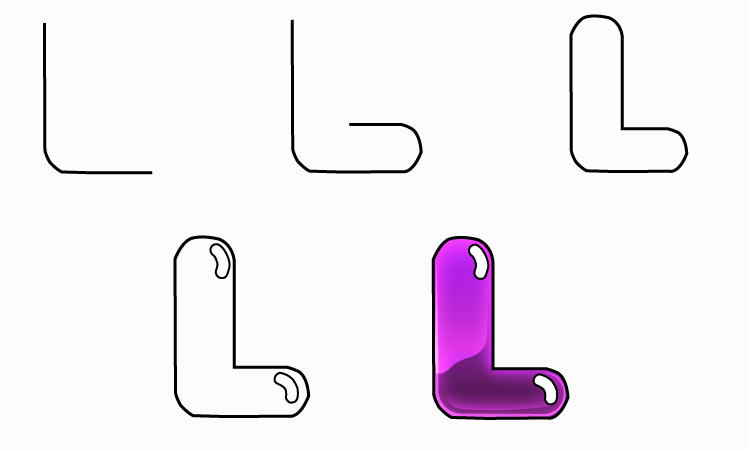
Bubble Letter L Drawing
For the "L", round out both the vertical line and the horizontal bottom. The letter should have a thick, puffed-up bottom edge that contrasts with the rounded top.
Bubble Letter M Drawing
Start with the "M" and round all the points. Make the two vertical lines puffy and the diagonal lines smooth and curved. This creates a soft, bubbly "M".

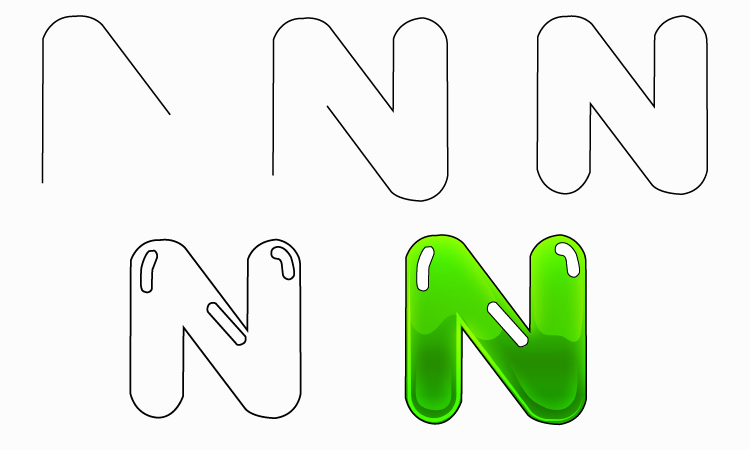
Bubble Letter N Drawing
For the "N", round off the vertical lines and make the diagonal line curved rather than sharp. Add thickness to all the edges to make the letter appear inflated.
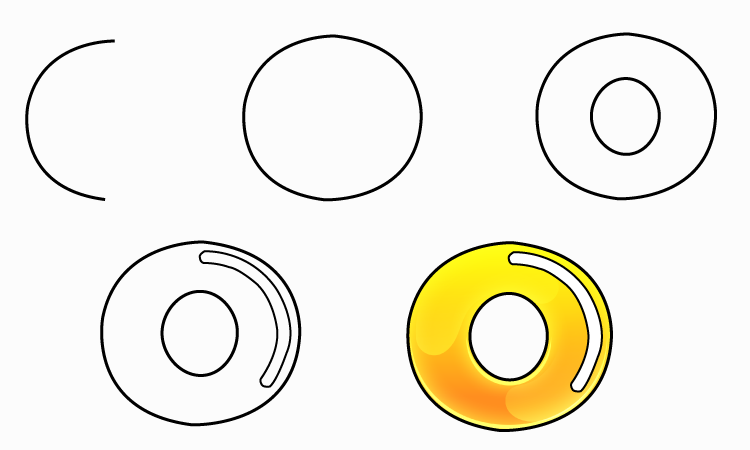
Bubble Letter O Drawing
The letter "O" is one of the easiest bubble letters to draw! Simply start with a circle and make the edges thick and smooth. Round the inner edges to give it that bubble-like quality.
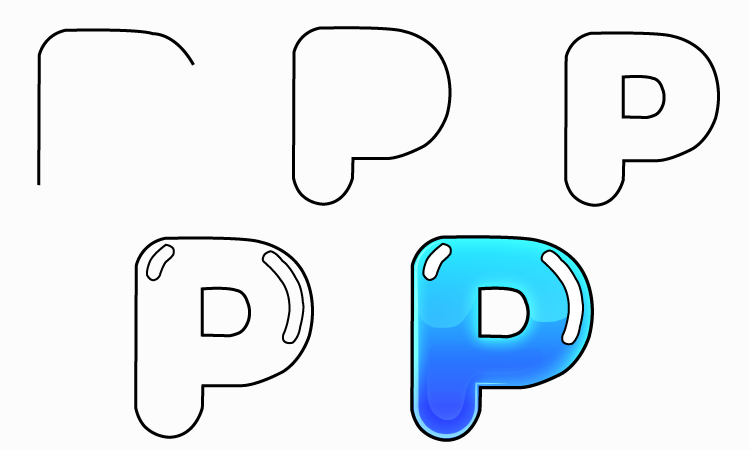
Bubble Letter P Drawing
The "P" starts with a simple straight line, but you’ll want to make the curve of the "P" large and rounded. Add thickness to both the vertical and curved portions, making the letter appear inflated.
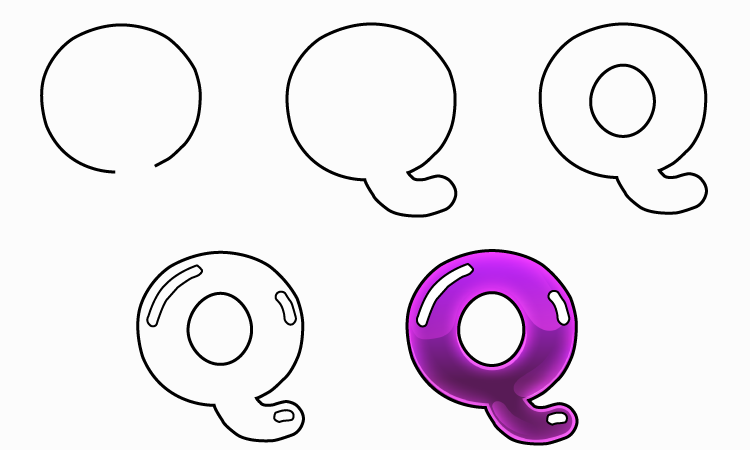
Bubble Letter Q Drawing
For the "Q", draw a circular "O" shape first, and then add a rounded tail at the bottom. Make sure the tail is curvy and thick to maintain the bubble effect.
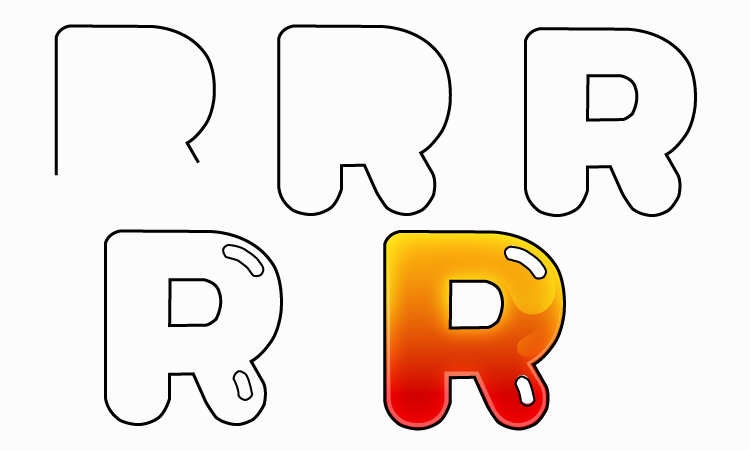
Bubble Letter R Drawing
Start with a rounded "P" shape, but add a small diagonal leg coming off the bottom right side of the "P". Round the edges of the leg as well, so it maintains that soft, inflated appearance.
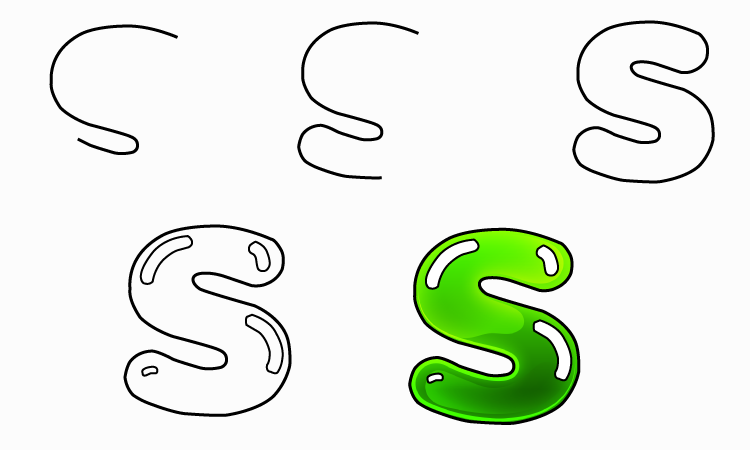
Bubble Letter S Drawing
The letter "S" is made by first drawing a simple "S" and then rounding all the corners. Make the top and bottom curves puffed up and thick to create a bubbly effect.
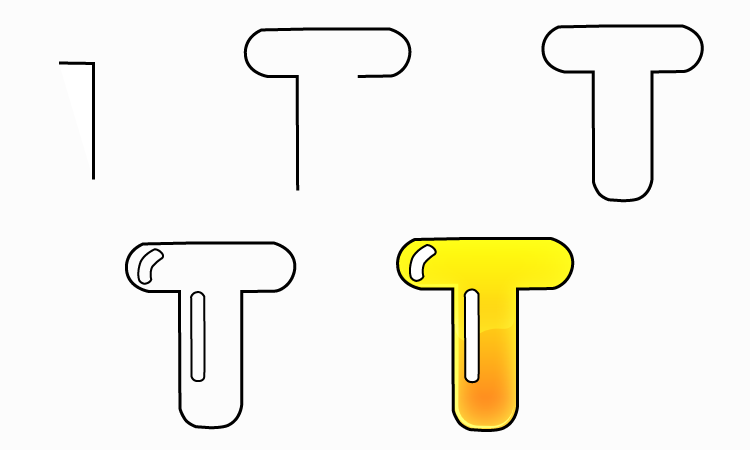
Bubble Letter T Drawing
For the "T", round the edges of both the vertical line and the top horizontal line. Add thickness to both parts and make the letter appear soft and inflated.
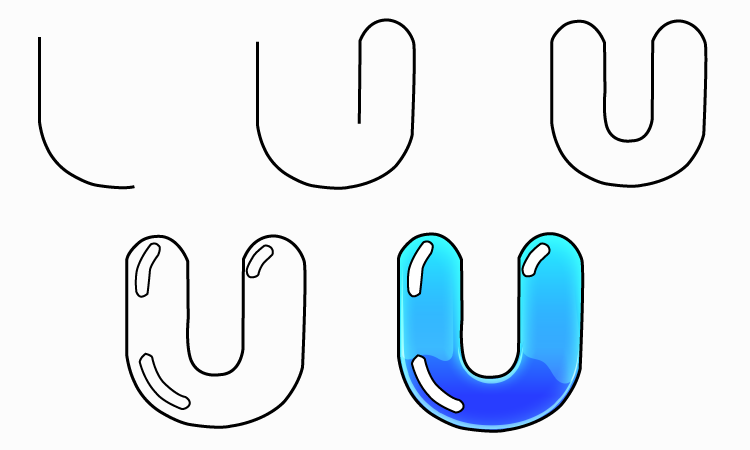
Bubble Letter U Drawing
Begin with a "U" shape, and round the edges. Make the bottom part of the "U" puffed up and thick, giving the letter a rounded, balloon-like look.
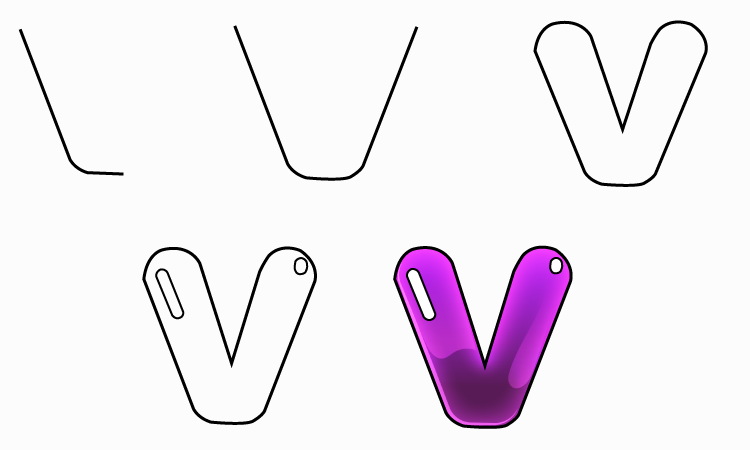
Bubble Letter V Drawing
The "V" starts with a simple "V" shape but round the points and edges. Add thickness to the arms to give it a puffy, bubbly feel.
Bubble Letter W Drawing
For the "W", make the points at the bottom rounded and thick. Round off the top edges and make the two vertical lines puffy, resulting in a soft, bubbly letter.

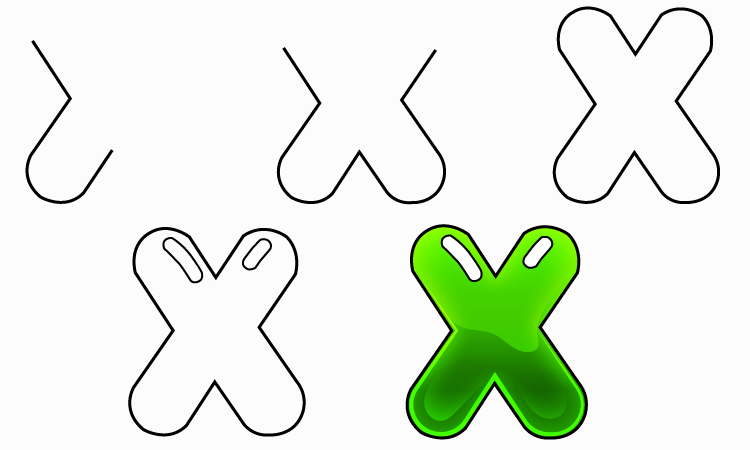
Bubble Letter X Drawing
The "X" is drawn by first making a simple "X" shape, but then rounding off each of the diagonal lines. Make sure the intersecting part of the "X" has a smooth, curved appearance.
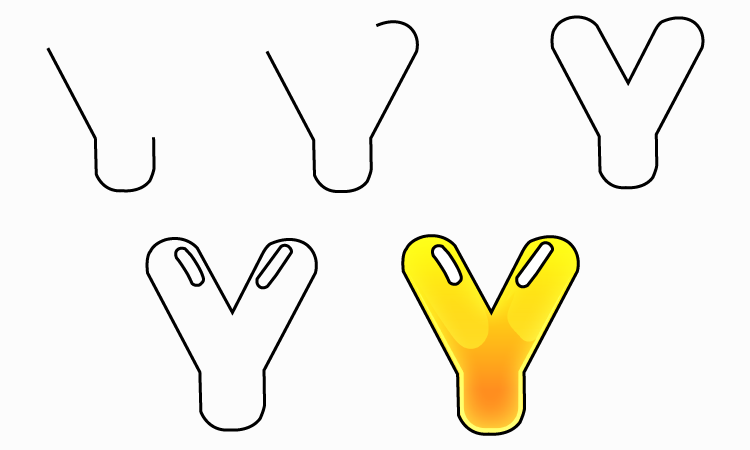
Bubble Letter Y Drawing
Start with a "Y" shape, but round the top branches and make them thick. The vertical line should also be rounded and inflated to match the bubbly style.
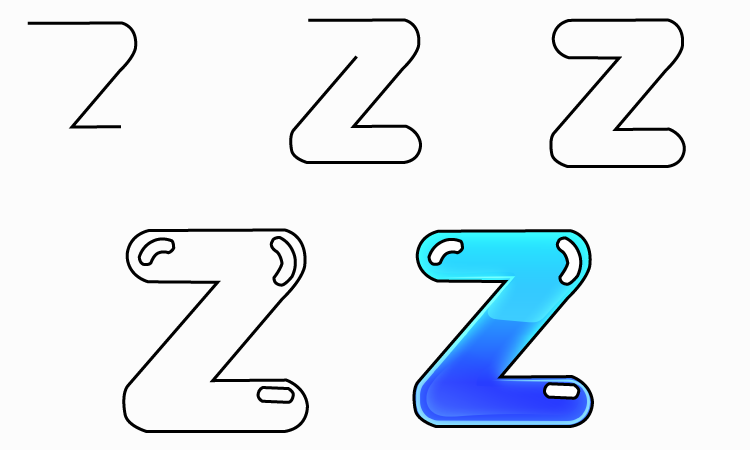
Bubble Letter Z Drawing
For the "Z", draw a normal "Z" but round off each of the corners and edges. Make the diagonal lines thick and puffed up to complete the bubble effect.
Final Tips for Drawing Bubble Letters:
- Experiment with Styles: Try adding extra details like stars, hearts, or patterns inside the letters for even more creativity.
- Use Different Colors: Fill in your bubble letters with vibrant colors to make them stand out. Ombre effects, gradients, or outlines can add depth to your letters.
- Practice Makes Perfect: Keep practicing, and soon you'll have your own unique bubble letter style.
Bubble letters are an easy and fun way to transform ordinary text into playful and engaging designs. Whether you’re creating banners, greeting cards, or just doodling, following these steps will help you master the art of bubble lettering.
